The aim of this experiment is to create a “live USB” stick.
Background information:
Laptop HP Pavilion AMD A8-6410 AP with 8 gb. ram with AMD Radeon R5 Graphics. running Debian 8.1 (Jessie)
USB Kingston DTSE9 8Gb <- added later,
Complements Superuser.com. under What command you use to find out hardware info?… So its a learning curve for everyone! inc. me.

grep "model name" /proc/cpuinfo laptop specs.
grep MemTotal /proc/meminfo Amount of memory
head -n1 /etc/issue . shows the linux version 8 for me.
I tried to install gnome disk, https://git.gnome.org/browse/gnome-disk-utility
 (I didn’t download anything, they were all .tar.xz wasn’t too sure how to install them, so I left them alone.) but it seems that its installed already, I checked Synaptic,
 Its already there, and up to date, all unbeknown to me. . I went to the command prompt and tried gnome disk.. and the reply command not found, also checked all the gui ‘s and nothing..
I also tried to install Unetbootin, but I’m not too sure how to update a depositary, on Debian. So i’m going to document as well as I can. I went to this website https://packages.debian.org/wheezy/amd64/unetbootin/download
the site told me I should use synaptic or aptitude to download the program, I did check, and it didn’t exist in synaptic (for me) I checked using the keywords unetboot, unetbootin, an finally unetbootin_575-1_amd64.deb, As I made sure that everything was up todate this error appeared Could not download all repository indexes
The repository may no longer be available or could not be contacted because of network problems. If available, an older version of the failed index will be used. Otherwise, the repository will be ignored. Check your network connection and ensure the repository address is correct in ‘Repositories’ under ‘Settings’.
GPG error: http://shell.ninthgate.se squeeze InRelease: The following signatures couldn’t be verified because the public key is not available: NO_PUBKEY E639BFCB72740199Failed to fetch cdrom://[Debian GNU/Linux 8.1.0 _Jessie_ – Official amd64 DVD Binary-1 20150606-14:19]/dists/jessie/contrib/binary-i386/Packages Please use apt-cdrom to make this CD-ROM recognized by APT. apt-get update cannot be used to add new CD-ROMs
Failed to fetch cdrom://[Debian GNU/Linux 8.1.0 _Jessie_ – Official amd64 DVD Binary-1 20150606-14:19]/dists/jessie/main/binary-i386/Packages Please use apt-cdrom to make this CD-ROM recognized by APT. apt-get update cannot be used to add new CD-ROMs
Failed to fetch http://http.debian.net/debian/dists/jessie-backports/main/binary-amd64/PackagesIndex Hash Sum mismatch
Failed to fetch http://http.debian.net/debian/dists/jessie-backports/main/binary-i386/PackagesIndex Hash Sum mismatch
Some index files failed to download. They have been ignored, or old ones used instead.
after that I tried -> apt-get install unetbootin_575-1_amd64.deb on the command prompt,
From the pc->
root@debian5:/home/gearoid# apt-get install unetbootin_575-1_amd64.deb
Reading package lists… Done
Building dependency tree
Reading state information… Done
E: Unable to locate package unetbootin_575-1_amd64.deb
E: Couldn’t find any package by regex ‘unetbootin_575-1_amd64.deb’
Going back to do some more digging..
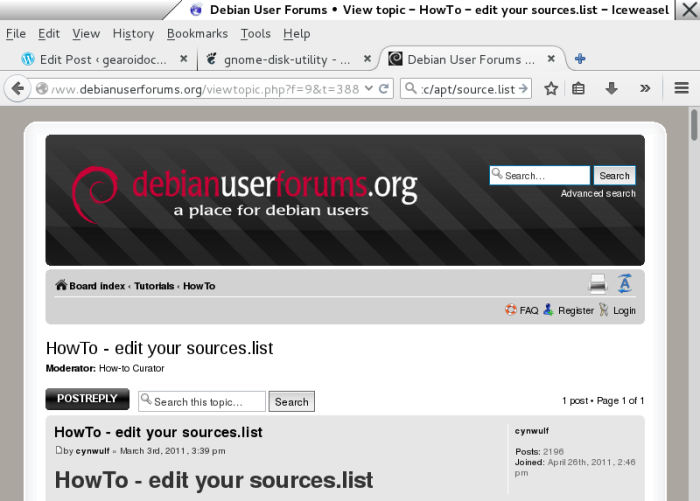
I’m going to edit the etc/apt/sources.list using nano but first im going to follow some simple guide lines…Backup, Backup, backup. why didn’t I check here first
I decided against editing my etc/apt/sources.list I was afraid that I would delete everything.
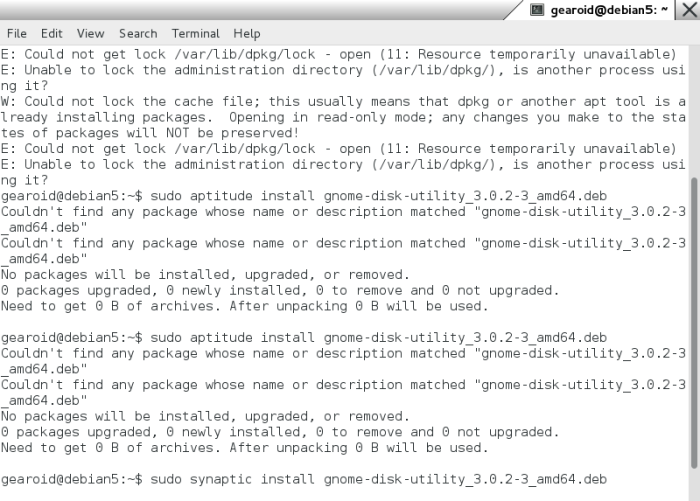
sudo aptitude install pool/main/g/gnome-disk-utility/
and also synaptic install pool/main/g/gnome-disk-utility/
and got this 
nothing happened ..
Calling it a night for now, must do more study into it..
Day 2 still nothing, not that I expected the faries to fix the problem during the night.. perhaps ill format the drive to EXT4 to see if that will solve the problem, finished, now I can’t see my hard-drive, while I’m trying to sort out this problem I’m downloading the distribution im going to install onto my usb, http://xubuntu.org/getxubuntu/#regular this version is 14.04 trusty tahr. wu Now my usb isn’t working so.. doing some reading and its not showing up as a anything..since I also have a windows machine I also tried to sort it out on that, (by just plugging it in and formatting)..but no such luck… so doing some digging and checking on the net i found a site that showed how to find your usb stick typing in the command sudo fdisk -l got a list of my usb /dev/sdc1 and dev/sdc2 drives Its back 🙂 I would you don’t know how many smiles I wanted to add.. I checked and double checked that it wasn’t my main hard-drive..still intact.
aside –checking the size to make sure that it wasn’t my harddrive.
putting in the command sudo mkfs.vfat /dev/sdc2 I got my usb back …so now I’m back to square one It was a learning curve for me.
Now back to square one…trying to create a USBlive stick. I was reading about this command called ‘dd’ but I’m stil too young and my machine has much too valuable information to mess around with this command. I’m still trying to make sure that its absolutely positively correct before using the above command.
I found a web page, I think from the tutors old students, I’m following this to see if it will help me. http://syn.theti.ca/2013/06/22/tutorial-wheezy-live-iso-hybrid-with-persistence-on-usb/ as I’m going through the instructions I find out that I don’t have ‘parted’ installed so I must go to synaptic and install it, by putting in my ‘Sudo’ password and putting in the Debian disk 1, since I’m installing parted I’m also going to check the other commands that I need for this process. Now all up to date. As I formatted the usb for the Xth time, I noticed that its on NONE for access for groups and for others. So how to change that, more study..I found this site
http://askubuntu.com/questions/321010/how-to-change-permissions-on-a-usb-stick

, I put in the commands on screen, It didn’t work I noticed it changed drive. to Sd0 as apposed to sdb. I checked if the above commands worked, no they didn’t Still nothing or still the same, more study needed.
Ok, I’m going with dd, well at least I’m going to try it. I backed up my system, (not going to go into detail here as I just followed someone elses blog or website http://www.aboutdebian.com/tar-backup.htm and followed the instructions there. On doing this again to be positive, I get an error,
sudo tar -xvpf /fullbackup.tar <- Me being all smart and backing up data!
[sudo] password for gearoid:
tar: /fullbackup.tar: Cannot open: No such file or directory
tar: Error is not recoverable: exiting now
gearoid@debian5:~$ not done.
Ok, I’m going to use dd or disk dump, I think I tried everything else, this decision is not taken lightly, in fact I’m nervous. So on doing some study on this command, thanks to http://www.linuxquestions.org/questions/linux-newbie-8/learn-the-dd-command-362506/ 
Look at the warning, atleast 5 times!! and if that wasn’t confusing and a serious “pls leave whist you can” then the command ist that easy to understand either. so getting what little information i could from this page (but is good as a reference. I thought id find a little more user friendly site http://askubuntu.com/questions/512059/using-dd-command-to-create-bootable-usb-stick, but i changed some of the commands first I checked where my usb stick was (and double checked, and checked again to be sure. df -h works /dev/sdb1 913M 913M 0 100% /media/gearoid/Xubuntu 14.04 LTS amd64 <- thats me, remember and write down /dev/sdb1 your usb.
now go into where you downloaded the .iso for me that was Downloads, using the command ls to see all the directorys and then cd Downloads .
->.gearoid@debian5:~/Downloads$ then the dd command, this requires the sudo command, so its sudo dd if= name of image.iso of =/dev/your usb bs= 1M (the bs is the amount of block data to be written,I left it the same) The command is broken up into two parts the first section is the input (the directory were it is stored) and the second is the output (destination, i.e. usb)
The command line syntax of dd differs from many other Unix programs, in that it uses the syntax option=value for its command line options, rather than the more-standard –option value or —option=value formats. By default, dd reads from stdin and writes to stdout, but these can be changed by using the if (input file) and of (output file) options. http://www.wikipedia.com
so the command in its everyday state,
when I ran this command there is no process bar so it takes time, also when booting for the first time also takes time, having a usb2.0 stick doesn’t help matters. At the end, I know how to use dd to make a flash drive… the entire use of the command I’m still working on. This is the command that I used, notice that i shortened the ubuntu.iso file down alot to avoid errors on my behalf, and also went into the Downloads directory I’m sure that you don’t need to go into the Downloads or for that matter any directory but it makes the command that more cumbersome (for a first time user) then when you boot it for the first time (on this machine i didnt have to go to any special settings it booted straight away (after a 3 minute black screen) but for the second and third times one has to go into the bootup settings or options.
$ sudo dd if= ubuntu.iso of=/dev/sdb bs=1M
Ran the program and since their is no progress bar, one has to wait until the cursor comes back, then reboot.
this reboot was different to the others as I didn’t have to select the usb stick it did it automatically.
then xubuntu splash screen appeared,
The END.
This is all possible by our lecturer Tero Karvinen -Thanks Tero http://terokarvinen.com/2016/agenda-for-linux-basics-dat8tf063-27-spring-2016
Sublimação é um processo com sentimento, concorrente do silkscreen, que
visa fazer sentimento em tecido e outrem materiais com difícil
tratamento.
LikeLike
Im sorry i don’t understand what you said, i even put it through google translate, it came out with very hard to read text.
Im hoping this helped you. As i said. I’m Just learning too. and using the DD command can wipe your hard drive if not careful. So pls be careful.
LikeLike